
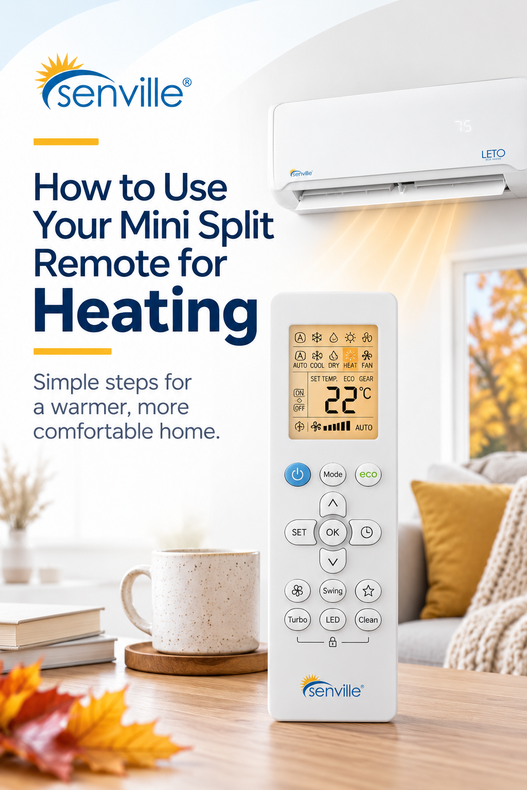
As cooler weather settles in, your mini split remote becomes one of the easiest ways to fine-tune comfort at home. But between Heat, Auto, Fan, Swing and other buttons, it isn’t always obvious which settings you actually need.
The good news is that heating your home with a Senville mini split doesn’t have to be complicated. Once you understand a few key controls, you can quickly select Heat Mode, choose your temperature and adjust airflow for comfortable fall operation.
This guide walks through the main remote settings to know when using your Senville mini split for heating.
QUICK ANSWER
To use your mini split for heating, press the MODE button on your remote until Heat Mode or the sun icon appears. Then set your desired temperature above the current room temperature and give the system a few minutes to begin heating.
What You’ll Learn
✓ How to select Heat Mode
✓ How to choose your temperature
✓ What fan-speed settings do
✓ How to adjust airflow
✓ The difference between Heat and Auto Mode
✓ Which additional remote features may be useful
✓ What to check if your system doesn’t immediately blow warm air
1. Start by Selecting Heat Mode
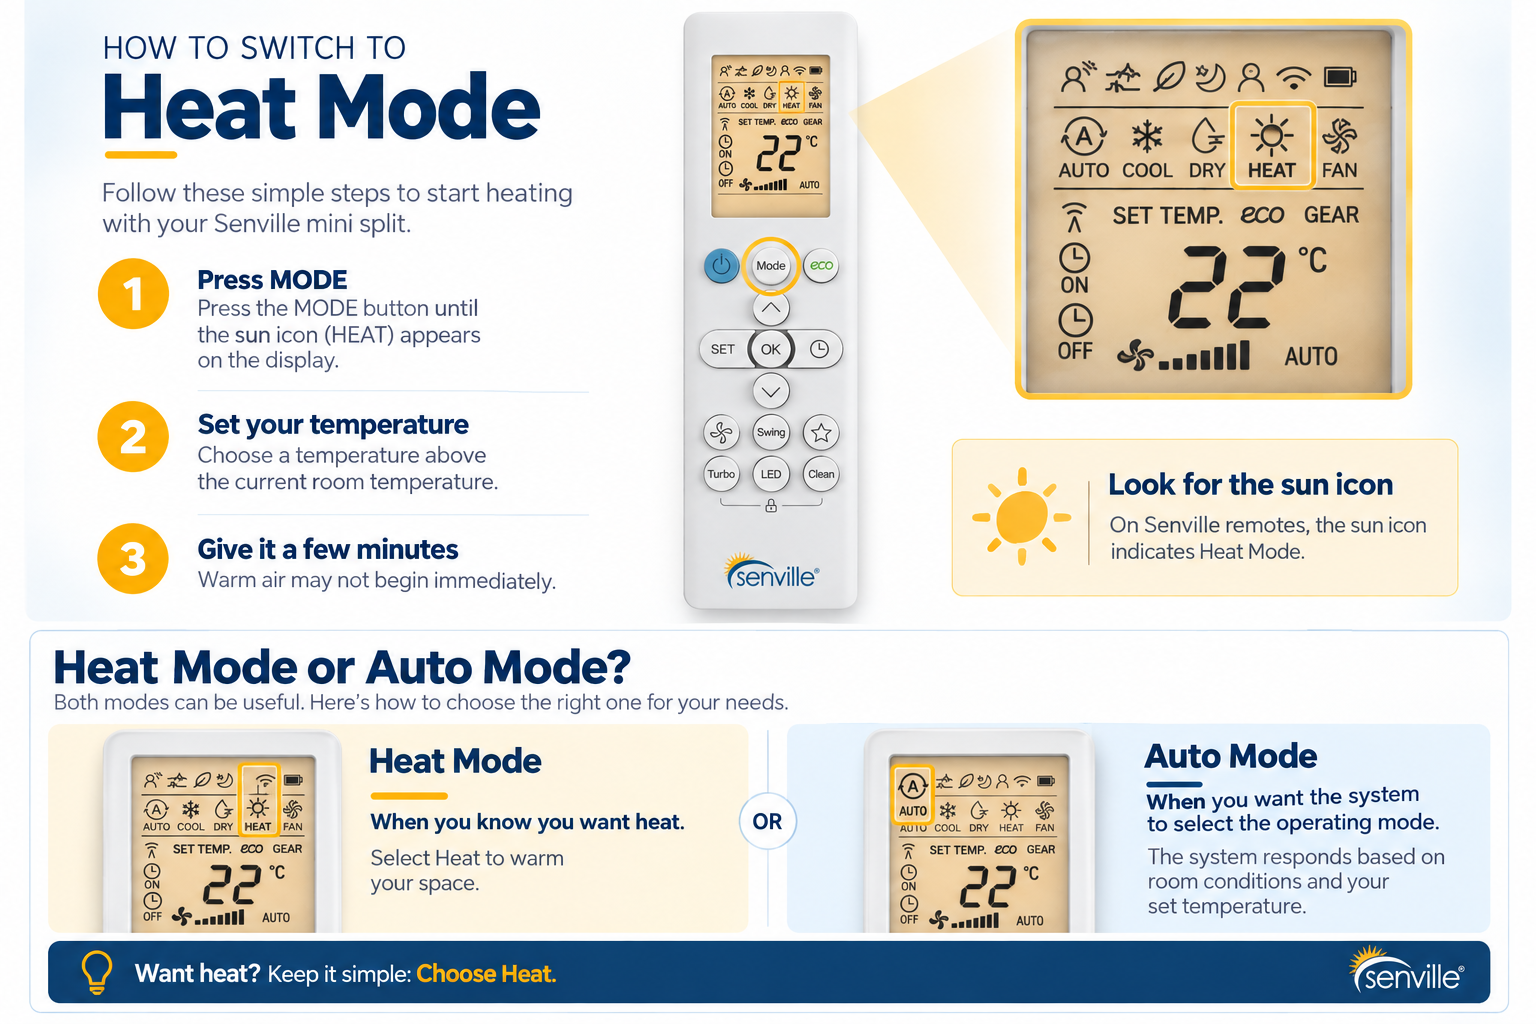
If you want your mini split to heat the room, start by selecting Heat Mode.
Press the MODE button on your remote until HEAT or the sun icon appears on the display. Depending on your remote, you may cycle through settings such as Auto, Cool, Dry, Heat and Fan before reaching Heat Mode.
Once Heat Mode is selected, you can choose your desired temperature.
2. Set Your Desired Temperature
Next, use the temperature controls to choose how warm you want the room to be.
If you’re testing Heat Mode, make sure the selected temperature is above the current room temperature so the system has a reason to call for heat.
There’s no need to dramatically raise the setting in an attempt to warm the room faster. Choose the temperature you actually want and give the system time to reach it.
QUICK TIP
Set it for comfort, not speed. Turning the temperature much higher doesn’t necessarily mean the room will warm faster. Choose a comfortable setting and let the system work toward it.
3. Choose Your Fan Speed
Your remote also lets you control how quickly air moves through the indoor unit.
Depending on your model, you may see the following options:
| Fan Setting | What It Does |
|---|---|
| Auto | Lets the system manage fan speed automatically |
| Low | Provides gentler airflow |
| Medium | Provides moderate airflow |
| High | Provides stronger airflow |
GOOD STARTING POINT
If you’re not sure which fan speed to use, Auto is a simple place to start. The system can then adjust fan operation based on the room’s heating needs.
4. Adjust the Airflow Direction
Temperature isn’t the only setting that affects how a room feels. Where the warm air is going matters too.
Depending on your model, the Swing or airflow controls on your remote allow you to change the position or movement of the indoor unit’s louvres.
During heating, adjusting the airflow can help distribute warm air more effectively throughout the occupied area of the room.
It’s also a good idea to check the space around the indoor unit. Furniture, curtains, shelving and other objects shouldn’t block the airflow leaving the unit.
AIRFLOW TIP
Remember that warm air naturally rises. Adjusting the louvres to direct warm air farther into the room can help distribute heat instead of allowing it to collect near the ceiling.
For controls specific to your system, visit our Tech+ Center.
5. Heat Mode vs. Auto Mode: What’s the Difference?
One of the most common questions when temperatures begin to fall is whether to use Heat or Auto.
They aren’t quite the same.
| If You Want To... | Try |
|---|---|
| Warm the room | Heat Mode |
| Let the system decide whether heating or cooling is needed | Auto Mode |
| Circulate air without actively heating or cooling | Fan Mode |
QUICK ANSWER
If your goal is specifically to heat the room, choose Heat Mode. Auto Mode selects an operating mode based on room conditions and the selected temperature. If you specifically want heating, choose Heat Mode.
6. What Does Follow Me Do?
You may notice a Follow Me button on some Senville remotes.
On compatible systems, Follow Me allows the remote to sense the temperature around its location and send that information back to the indoor unit.
Why can that be useful?
Your indoor unit is normally mounted high on a wall, while you might be sitting on a sofa or working across the room. The temperature around the remote can be different from the temperature near the indoor unit.
Follow Me can help the system respond to the temperature closer to where the remote is located.
For best results, keep the remote somewhere representative of the area you’re using rather than next to a window, heat source or other location that could affect its temperature reading.
IMPORTANT
Not every Senville remote or indoor unit supports every feature. Remote layouts and available functions can vary by model.
7. Get Familiar With the Other Buttons
Other Remote Features You May See
You don’t need to use all of these features to heat your home.
For everyday heating, focus first on the essentials: Heat Mode, temperature, fan speed and airflow direction. Once you’re comfortable with those controls, you can explore the additional features available on your particular system.
Some buttons may also perform different functions depending on the model, so your remote-control manual is the best reference when you want to explore a specific feature.
8. Give the System Time to Start Heating
You’ve selected Heat Mode, raised the temperature and waited a few seconds—but there’s no warm air yet.
That doesn’t necessarily mean something is wrong.
When heating starts, there may be a short delay before the indoor fan begins delivering warm air. Give the system a few minutes to respond before changing settings again.
GOOD TO KNOW
A short startup delay doesn’t automatically mean there’s a problem. Give the system a few minutes before beginning to troubleshoot.
If the system still isn’t heating as expected, start with the basics:
-
Confirm Heat Mode is selected
-
Make sure the set temperature is above the room temperature
-
Check that the indoor unit has power
-
Check your filters and airflow
-
If you have a multi-zone system, make sure another zone isn’t requesting an incompatible mode
If the issue continues, visit our support centre for troubleshooting resources and support.
9. Know What to Expect During Defrost
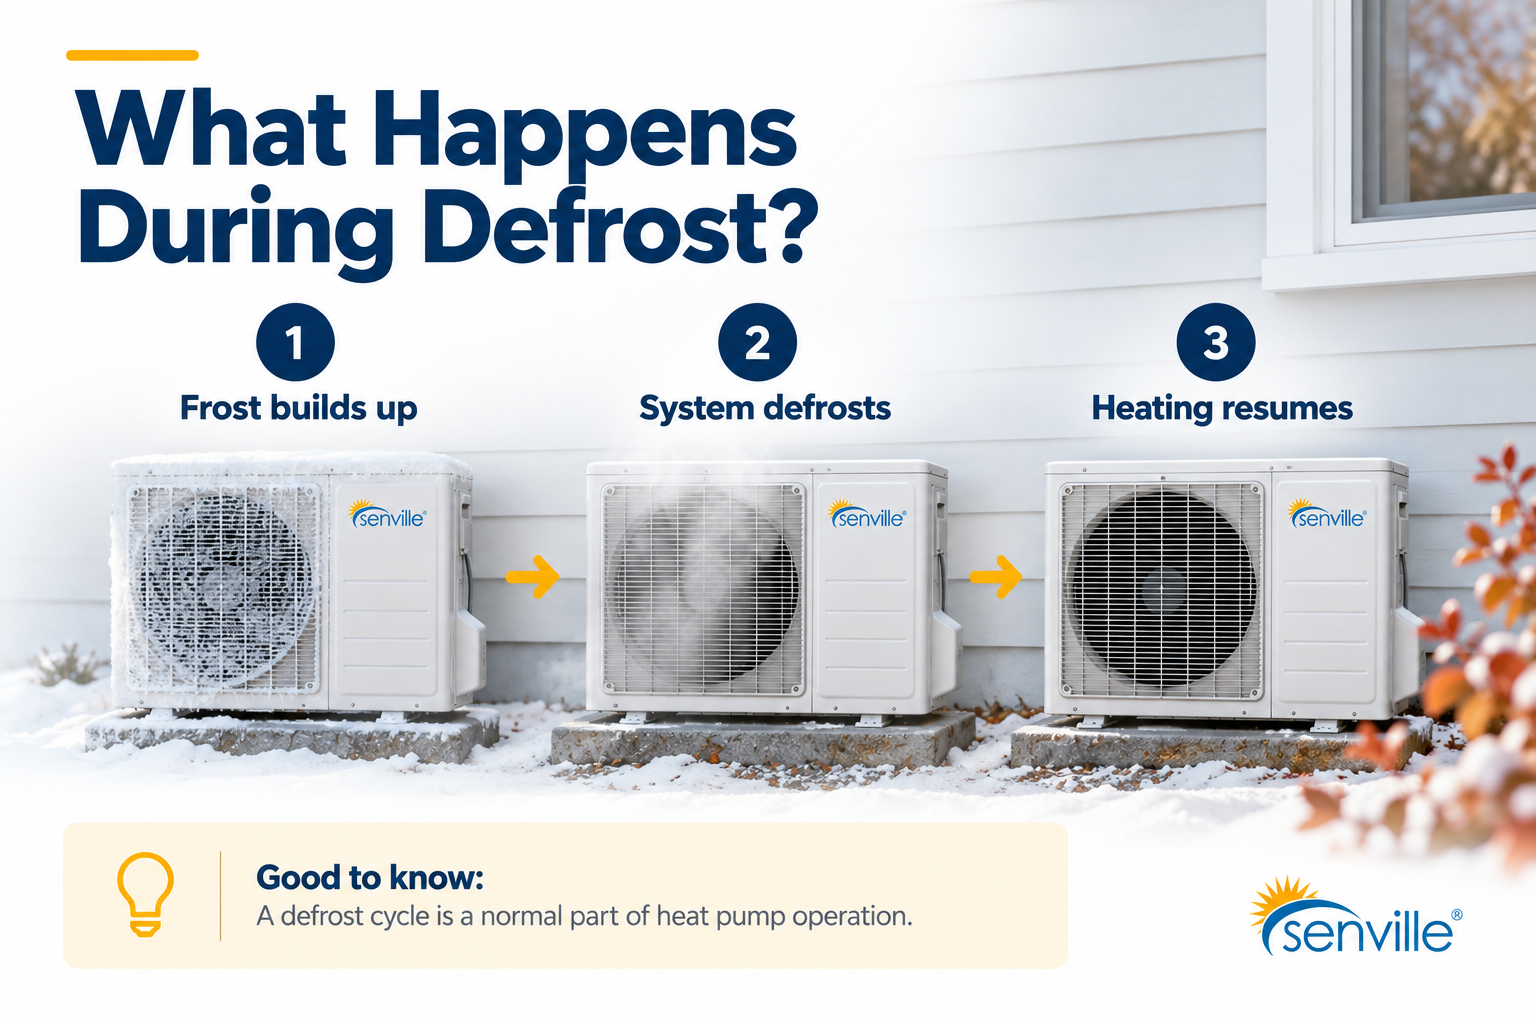
As temperatures get colder, your heat pump may occasionally behave a little differently.
During heating operation, frost can form on the outdoor coil under certain weather conditions. When needed, the system can temporarily enter a defrost cycle to remove that buildup.
During defrost, you may notice that heating temporarily pauses or changes. You may also see steam around the outdoor unit as frost melts.
This is a normal part of cold-weather heat pump operation.
QUICK ANSWER
A temporary change in operation during colder weather doesn’t necessarily mean there’s a problem. If your system enters a defrost cycle, heating may briefly pause or change while frost is cleared from the outdoor coil. Normal heating will resume once the cycle is complete.
10. A Note for Multi-Zone Systems
If you have a multi-zone system, there’s one additional thing to keep in mind when changing modes. The connected indoor units shouldn’t request heating and cooling at the same time. When switching to heating, set the indoor units you’re using to Heat Mode rather than leaving some in Cool or Auto Mode.
Multi-Zone Mode Conflict
Living Room
Heat Mode
Bedroom
Cool Mode
Indoor units connected to the same outdoor system should not request opposing heating and cooling modes at the same time. This creates a mode conflict because the outdoor system cannot provide heating to one connected indoor unit while simultaneously providing cooling to another.
MULTI-ZONE TIP
Take a quick walk through the house when switching to heating for the season. Checking each connected indoor unit can help prevent an accidental mode conflict.
Mini Split Heating Remote Cheat Sheet
A simple sequence to remember when you’re ready to heat your space.
IMPORTANT
Remote layouts and available functions can vary by model. Always refer to the manual for your specific system when using a feature you’re unfamiliar with.
Frequently Asked Questions
What symbol means Heat Mode on a mini split remote?
Look for the sun icon. On Senville remotes, this indicates Heat Mode. Press MODE until Heat or the sun symbol appears on the display.
Should I use Heat or Auto Mode?
If you specifically want to warm your home, select Heat Mode. Auto Mode allows the system to automatically select an operating mode based on room conditions and the selected temperature.
What fan speed should I use when heating?
If you’re unsure, Auto is a simple starting point. Depending on your remote, you may also be able to select Low, Medium or High manually.
Why isn’t my mini split blowing warm air immediately?
A short delay when heating starts can be normal. Give the system a few minutes before changing settings or beginning to troubleshoot.
What does Follow Me do?
On compatible systems, Follow Me uses the temperature sensed around the remote as an additional reference for controlling room comfort. This can be helpful when the temperature where you’re sitting differs from the temperature near the wall-mounted indoor unit.
Can I switch my remote between Celsius and Fahrenheit?
Some Senville remotes allow you to switch between °C and °F using a button combination. Because the controls vary between remote versions, check the manual for your specific model before using a shortcut.
Why does my mini split temporarily stop heating?
During cold weather, your heat pump may enter a defrost cycle to remove frost from the outdoor coil. Heating can temporarily pause or change during this process before normal operation resumes.
Are all Senville remotes the same?
No. Remote layouts, buttons and available features can vary between systems. If your remote doesn’t match the examples in this guide, use the remote-control manual for your specific model.
Get More From Your Remote This Heating Season
Your remote is the easiest way to control how your mini split heats your space, but you don’t need to master every button at once. Start with the controls that matter most, then explore additional features as you become more familiar with your system.
Knowing how to select the right mode, manage airflow and recognize normal heating behaviour can make seasonal changes much easier and help you feel more confident using your system when colder weather arrives.
Looking for a system that fits your home? Explore Senville Mini Split Systems.